Toronto Handyman Services

Blog

Bathroom Renovation & Comprehensive Handyman Services

Bathroom Renovation & Comprehensive Handyman Services

Bathroom Renovation & Comprehensive Handyman Services 1180 674 admin

A bathroom renovation is one of the best investments you can make in your home. It not only enhances the aesthetic appeal of your space but also increases your property’s value. Whether you’re updating a small guest bathroom or transforming your master bath into a luxurious retreat, Tony The Handyman is here to help. We provide comprehensive handyman services to bring your vision to life. From plumbing and tile work to custom vanities and lighting installation, we handle every aspect of your bathroom renovation with precision and care.

If you’re looking for expert craftsmanship and a stress-free renovation process, we can do this for you! Contact us today at (437) 818-5979 for a free estimate.


Why Choose Tony The Handyman for Your Bathroom Renovation?

When it comes to comprehensive handyman services, you deserve a team that is experienced, reliable, and dedicated to delivering top-notch results. At Tony The Handyman, we take pride in turning ordinary bathrooms into extraordinary spaces that combine functionality with style.

Our Bathroom Renovation Services Include:

Custom Tile Work – Floor tiles, shower tiles, and backsplashes tailored to your design preferences.
Plumbing & Fixtures – Installation and upgrades of sinks, toilets, tubs, and more.
Lighting Installation – Modern and energy-efficient lighting solutions for a bright and elegant look.
Vanities & Cabinetry – Custom-built or pre-made options to maximize storage and aesthetics.
Flooring Upgrades – Waterproof, durable, and stylish flooring choices that enhance your bathroom’s appeal.
Painting & Finishing Touches – Professional painting services to give your space a polished look.

We understand that every homeowner has different needs and budgets. That’s why our comprehensive handyman services are completely customized to meet your specific requirements.


Transform Your Bathroom into a Luxurious Space

Your bathroom should be more than just a functional space—it should be a sanctuary where you can unwind and refresh. Whether you want a spa-like retreat, a sleek modern look, or a timeless classic design, our comprehensive handyman services will bring your dream bathroom to life.

Trending Bathroom Design Ideas:

Minimalist & Modern: Sleek lines, floating vanities, and neutral tones for a contemporary feel.
Rustic & Cozy: Wooden accents, warm lighting, and stone tiles to create a welcoming atmosphere.
Classic & Elegant: Freestanding tubs, vintage fixtures, and marble countertops for a sophisticated look.
Smart & High-Tech: Motion-sensor faucets, LED mirrors, and heated flooring for added convenience.

With so many options available, designing your ideal bathroom can feel overwhelming. But don’t worry—we can do this for you! Our expert team will guide you through the entire process, helping you choose the perfect layout, colors, and materials.

Ready to get started? Call us at (437) 818-5979 today for a free estimate!


The Benefits of a Professional Bathroom Renovation

A bathroom renovation is a big investment, but the benefits far outweigh the costs. By hiring experts for the job, you ensure that everything is done correctly and efficiently. With our comprehensive handyman services, you can enjoy a beautifully upgraded space without the stress.

Why Invest in a Bathroom Renovation?

Increase Home Value – A newly renovated bathroom can significantly boost your property’s resale value.
Improve Energy Efficiency – Upgrade to water-saving fixtures and LED lighting to lower your utility bills.
Enhance Functionality – Make the most of your space with smart storage solutions and modern features.
Create a Relaxing Atmosphere – Transform your outdated bathroom into a stylish and comfortable oasis.

At Tony The Handyman, we take care of every detail, ensuring a smooth and seamless renovation experience. From start to finish, we’ll handle everything—so you don’t have to!


Affordable and High-Quality Bathroom Renovations

We believe that a high-quality renovation shouldn’t come with an outrageous price tag. That’s why we offer comprehensive handyman services that fit a variety of budgets without compromising on quality.

How We Keep Costs Affordable:

Transparent Pricing – No hidden fees or unexpected costs!
Expert Recommendations – We help you choose cost-effective materials that look great and last long.
Efficient Project Management – We work quickly and efficiently to complete your project on time and within budget.

Our goal is to deliver outstanding results at a price you can afford. No matter the size or scope of your bathroom renovation, we’ll work with you to create a space that matches your vision.

Let’s get started! Contact us today for a free consultation and estimate.


Why Clients Trust Tony The Handyman

We are committed to delivering comprehensive handyman services that exceed our clients’ expectations. But don’t just take our word for it—see why homeowners continue to choose Tony The Handyman for their bathroom renovations.

What Sets Us Apart?

Experienced Professionals – Our skilled team has years of hands-on experience in home renovations.
Customer-Centered Approach – We listen to your needs and work closely with you to achieve your dream bathroom.
Top-Quality Craftsmanship – We use only the best materials and proven techniques to ensure long-lasting results.
Timely Completion – We respect your schedule and complete projects on time.
Satisfaction Guaranteed – We stand behind our work and won’t stop until you’re 100% happy with the final result.

Choosing the right contractor can be tough, but with Tony The Handyman, you’re in good hands.


Our Bathroom Renovation Process – What to Expect

We understand that home renovations can feel overwhelming. That’s why we’ve streamlined our process to make it as smooth and stress-free as possible. When you choose our comprehensive handyman services, here’s what you can expect:

Step 1: Free Consultation & Estimate

We assess your space, discuss your vision, and provide a detailed, no-obligation quote.

Step 2: Design & Planning

We help you select materials, fixtures, and finishes that align with your style and budget.

Step 3: Demolition & Preparation

We carefully remove old tiles, fixtures, and outdated elements while minimizing disruption to your home.

Step 4: Installation & Renovation

Our skilled team installs new plumbing, tiles, cabinetry, and other features with precision.

Step 5: Final Touches & Cleanup

We add the finishing details, conduct a final inspection, and leave your space spotless.

From start to finish, we’ll handle everything so you don’t have to! We can do this for you—get in touch today for a free estimate!


Get Started with Tony The Handyman Today!

Your dream bathroom is just a phone call away! With our comprehensive handyman services, we’ll take care of every detail and create a space you’ll love for years to come.

📞 Call us today at (437) 818-5979 for a FREE estimate and let’s get started!

Expert craftsmanship
Affordable pricing
On-time completion

Tony The Handyman – Your Trusted Partner in Bathroom Renovations!


Need other home improvement services? We offer kitchen renovations, flooring installations, painting, and much more. Contact us today to learn more about our comprehensive handyman services!


Design Solutions for Renovation Work – Tony The Handyman

Expert Design Solutions for Renovation Work – Tony The Handyman

Expert Design Solutions for Renovation Work – Tony The Handyman 1181 675 admin

Renovating your home or business is more than just a project—it’s an investment in comfort, functionality, and style. Whether you want to modernize your kitchen, create a spa-like bathroom, or transform your basement into a cozy retreat, Tony The Handyman is here to help.

We specialize in renovation work, offering custom design solutions that bring your vision to life. Our team ensures every detail is planned and executed to perfection, saving you time, money, and unnecessary stress. Best of all, we provide free estimates, so you can get started without any financial commitment.

If you’re ready to upgrade your space, we can do this for you! Give us a call today at (437) 818-5979 to discuss your project.


Why Design Solutions Are Essential in Renovation Work

When starting a renovation, many people focus solely on the end result. However, the key to a successful renovation work project is expert design and careful planning. Without it, you could face unexpected challenges, budget overruns, and extended timelines.

At Tony The Handyman, we take a strategic approach to every renovation. Our design solutions ensure that:

Space is optimized for functionality – Every inch is used efficiently.
Aesthetic preferences are met – We tailor designs to match your style.
Budget is respected – We provide cost-effective solutions without sacrificing quality.
Project stays on schedule – Our team works efficiently to meet deadlines.

No matter how big or small your renovation work, we handle it all—from initial consultation to final installation.


Our Renovation Work Services – Your Dream Home Starts Here

Kitchen Renovations – Cook and Entertain in Style

Your kitchen isn’t just a place to cook—it’s the heart of your home. A well-designed kitchen improves efficiency, adds value to your property, and enhances your overall lifestyle.

At Tony The Handyman, we offer full-service kitchen renovations, including:

  • Custom Cabinetry & Storage – Say goodbye to clutter with smart storage solutions.
  • Premium Countertops – Choose from quartz, granite, or marble for a sleek and durable finish.
  • Modern Backsplashes & Flooring – Elevate your kitchen’s aesthetics with stylish materials.
  • Energy-Efficient Lighting & Fixtures – Save on utility bills while improving ambiance.
  • Open-Concept Layouts – Create a spacious and welcoming environment for family gatherings.

Are you ready to revamp your kitchen? We can do this for you! Call (437) 818-5979 today for a free estimate.


Bathroom Renovations – Transform Your Space into a Private Oasis

Your bathroom should be a place of relaxation and comfort. Whether you want a sleek, modern look or a cozy, traditional feel, our bathroom renovation services include:

  • Elegant Vanities & Sinks – Upgrade your space with stylish and functional fixtures.
  • Luxury Walk-in Showers & Bathtubs – Enjoy spa-like comfort in your own home.
  • Custom Tile Work – Add a touch of sophistication with intricate designs.
  • Smart Storage Solutions – Keep your essentials organized and easily accessible.
  • Water-Efficient Plumbing – Reduce water waste while maintaining top performance.

A well-planned renovation work project can increase your home’s value while making your daily routine more enjoyable. Contact us today for a free estimate!


Living Room & Basement Makeovers – Maximize Your Space

If your living room or basement feels outdated or underutilized, a renovation can completely transform it into a stylish and functional space. Our services include:

  • Open-Concept Designs – Create an airy, inviting atmosphere.
  • Custom Entertainment Centers – Add built-in shelves and sleek media units.
  • Basement Conversions – Turn your basement into a home office, guest suite, or playroom.
  • Lighting & Flooring Upgrades – Choose from hardwood, vinyl, or tile for a modern finish.
  • Accent Walls & Fireplaces – Add character and warmth to your home.

A professional renovation work project can breathe new life into your home while enhancing comfort and functionality. Let’s make it happen!


Why Choose Tony The Handyman?

We know that choosing the right contractor for your renovation work is a big decision. That’s why we go above and beyond to provide exceptional service. Here’s what makes us different:

Years of Experience – We’ve successfully completed countless renovations.
Transparent Pricing – No hidden fees—just fair, honest estimates.
Skilled Craftsmanship – We take pride in our attention to detail. Fast & Reliable Service – Your project will be completed on time.
Customer Satisfaction Guaranteed – We work until you’re 100% happy.

If you’re thinking about renovation work, we can do this for you! Get in touch with us today for a free estimate at (437) 818-5979.


Frequently Asked Questions (FAQs)

1. How long does renovation work take?

The timeline depends on the size and complexity of the project. Small updates may take a few days, while larger renovations can take several weeks. We’ll provide a detailed timeline before starting.

2. How much does renovation work cost?

Costs vary based on materials, labor, and project scope. However, we provide transparent pricing with no hidden fees. Contact us for a free estimate!

3. Do I need a permit for my renovation?

Some renovation work projects require permits, especially for structural changes and electrical work. Don’t worry—we’ll handle the paperwork and ensure everything is up to code.

4. Can I live in my home during the renovation?

Yes, in most cases! We work efficiently to minimize disruptions, keeping your home as comfortable as possible during the process.

5. How do I get started?

It’s easy! Call us at (437) 818-5979, and we’ll schedule a consultation to discuss your needs.


Let’s Bring Your Vision to Life!

At Tony The Handyman, we believe that every home deserves to be beautiful, functional, and tailored to its owner’s needs. Whether it’s a simple refresh or a full-scale renovation, our team is here to make the process smooth, stress-free, and affordable.

Free Estimates Available – Get a quote with no obligation.
Competitive Pricing – Quality work that fits your budget.
Fast & Reliable Service – We complete projects on time.
Exceptional Craftsmanship – Attention to detail in every project.

Don’t wait—start your renovation work today!

📞 Call (437) 818-5979 now for your free estimate

Expert Roofing Repair Services

Expert Roofing Repair Services – Fast, Reliable & Affordable

Expert Roofing Repair Services – Fast, Reliable & Affordable 894 701 admin

A damaged roof can quickly turn into a homeowner’s nightmare. If you’ve noticed leaks, missing shingles, or general wear and tear, don’t wait until it’s too late! At Tony The Handyman, we specialize in top-notch roofing repair services that restore the safety, durability, and appearance of your roofing.

We understand that roofing problems can be overwhelming, but we’re here to make the process smooth and stress-free. Our team of skilled professionals is ready to provide fast, efficient, and cost-effective solutions for all your roofing needs. Whether you need minor fixes or extensive repairs, we can do this for you!

🚀 Don’t let a small issue turn into a costly disaster! Call us today at (437) 818-5979 for a free estimate, and let’s get your roof back in shape!


Why Choose Our Roofing Repair Services?

When it comes to your home, you deserve the best care and attention. At Tony The Handyman, we take pride in providing exceptional roofing repair services that you can rely on. Here’s why homeowners continue to trust us:

Highly Experienced Team – With years of hands-on experience, we have the expertise to handle any roofing repair, big or small.
Premium-Quality Materials – We only use the best materials to ensure your roof remains sturdy and long-lasting.
Fast & Reliable Service – We understand the urgency of roofing issues, which is why we offer same-day service whenever possible.
Affordable Pricing – Quality repairs don’t have to break the bank! We offer competitive pricing with no hidden fees.
Satisfaction Guaranteed – Your peace of mind matters to us. That’s why we stand by our work and guarantee top-quality results.

🌟 Still unsure? Give us a call at (437) 818-5979 and let’s discuss how we can help you today!


Common Roofing Problems We Fix

Roof issues can come in many forms, but the good news is—we can fix them all! Our roofing repair services cover a wide range of problems, including:

1. Leaky Roof Repairs

Nothing is more frustrating than dealing with a leaky roof. Not only does it create unsightly water stains, but it can also lead to mold growth, structural damage, and insulation issues. We specialize in detecting and fixing leaks fast before they cause further problems.

2. Shingle Replacement

Are your shingles missing, cracked, or curling at the edges? Over time, exposure to harsh weather can cause shingles to deteriorate, leaving your home vulnerable to the elements. Our team will replace damaged shingles quickly, ensuring your roof remains strong and secure.

3. Flat Roof Repairs

Flat roofs require specialized care and maintenance. If you notice water pooling, cracks, or blisters on your flat roof, it’s time for professional repairs. Our experts know exactly how to handle flat roof issues, extending its lifespan and protecting your home.

4. Storm Damage Repairs

Severe weather can wreak havoc on your roof. Strong winds, heavy rain, and hail can cause serious damage, leaving your home exposed to the elements. We provide fast and reliable storm damage repair services, so you don’t have to worry about long-term problems.

5. Flashing and Gutter Repairs

Flashing and gutters play a crucial role in keeping water away from your home. However, damaged flashing and clogged gutters can lead to leaks and foundation problems. We’ll inspect and repair these critical components to prevent costly water damage.

6. Emergency Roofing Repair Services

🚨 Roofing emergency? We understand that some repairs just can’t wait! Whether it’s a major leak, fallen shingles, or unexpected structural damage, our emergency roofing repair services are available when you need them most.


How Our Roofing Repair Process Works

We make roof repairs easy, efficient, and stress-free. Here’s what you can expect when you choose Tony The Handyman:

Step 1: Free Roof Inspection & Estimate

First, we conduct a detailed inspection of your roofing to identify the issue. Then, we provide a clear and honest estimate with no hidden fees.

Step 2: Tailored Repair Plan

Next, we discuss the best repair solutions for your roof. We’ll walk you through every step of the process, so you know exactly what to expect.

Step 3: Expert Repairs

Our skilled technicians will complete the necessary repairs with precision and care, ensuring your roofing is restored to top condition.

Step 4: Final Inspection & Cleanup

Before we leave, we perform a final quality check and clean up the work area, leaving your property neat and tidy.

💡 With our professional approach, you’ll never have to worry about roofing problems again!


Signs You Need Roofing Repair Services ASAP

Not sure if your roof needs fixing? Here are some warning signs to look out for:

Water stains on ceilings or walls – This is a clear indication of a leak.
Missing, cracked, or curled shingles – Damaged shingles can lead to leaks and structural issues.
Moss or algae growth – This can weaken roofing materials over time.
Sagging roof sections – This could mean serious structural damage.
Rising energy bills – Poor insulation due to a damaged roof can increase your heating and cooling costs.

🚨 If you notice any of these warning signs, don’t wait! Contact us today for expert roofing repair services before the damage worsens.


Get a Free Estimate for Your Roofing Repairs Today!

At Tony The Handyman, we understand that roof repairs can feel overwhelming. But with our expert team, top-quality materials, and customer-focused approach, we make the process fast, easy, and affordable.

🏠 Don’t let roofing problems put your home at risk! Whether you need minor repairs or major fixes, we’ve got you covered.

📞 Call us today at (437) 818-5979 to schedule a FREE estimate! Or, simply fill out our online contact form, and we’ll get back to you as soon as possible.


Tony The Handyman – Your Trusted Roofing Repair Experts!

🚀 Reliable. Affordable. Stress-Free. Let’s fix your roof today!

how to set up skylight frame

How to Set Up Skylight Frame: A Comprehensive Guide

How to Set Up Skylight Frame: A Comprehensive Guide 879 597 admin

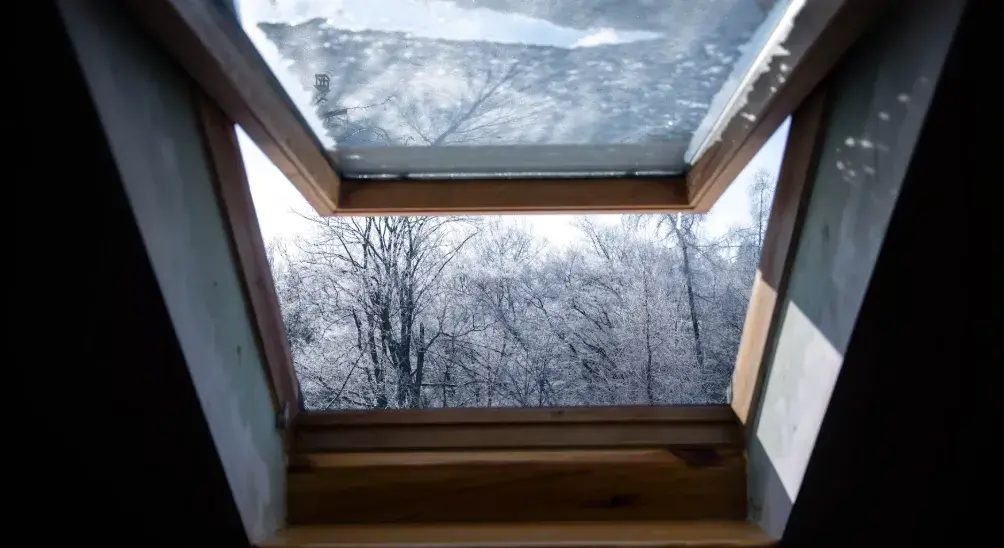
Installing a skylight can brighten up your home, enhance energy efficiency, and create a visually appealing architectural feature. While many homeowners may think it’s a challenging task, this detailed guide on how to set up skylight frame will walk you through each step with clarity. With the right tools, materials, and approach, you can achieve a professional-grade installation even as a DIY enthusiast.

If at any point you feel unsure, don’t hesitate to call Tony The Handyman at (437) 818-5979. Our team can take care of the entire process efficiently, and you might even qualify for a special discount!


Benefits of Installing a Skylight

Before diving into the process, let’s understand why skylights are a worthwhile addition to any home:

  • Natural Illumination: A skylight floods your space with natural light, reducing reliance on artificial lighting.
  • Energy Savings: Beyond light, skylights can provide warmth during the colder months, lowering heating costs.
  • Enhanced Aesthetics: They add a modern, upscale touch to interiors, making your home more inviting and potentially increasing its resale value.
  • Ventilation: Some skylights offer ventilation options, improving indoor air quality.

Now that you understand the benefits, let’s dive into how to set up skylight frame step-by-step!


Tools and Materials Checklist

Before starting, gather all the essential tools and materials to avoid interruptions. You’ll need:

  • Measuring tape
  • Circular or reciprocating saw
  • Utility knife
  • Drill and screws
  • Roofing nails
  • Roofing hammer
  • Waterproof flashing
  • Silicone caulk
  • Protective gloves and goggles
  • Foam or fiberglass insulation
  • Spirit level

Having these on hand ensures your journey to learning how to set up skylight frame is smooth and stress-free.


Step 1: Select the Right Location for the Skylight

The first step in your project is deciding where to place the skylight. Factors to consider include:

  • Roof Structure: Choose a spot where roof trusses won’t obstruct installation.
  • Sunlight Exposure: Aim for an area with maximum sunlight throughout the day.
  • Room Functionality: Skylights are ideal for living rooms, kitchens, or bathrooms.

Pro Tip: If you’re uncertain about the best spot for your skylight, Tony The Handyman offers expert advice tailored to your home. Call us at (437) 818-5979!


Step 2: Measure and Mark the Opening

Using your measuring tape, carefully outline the dimensions of your skylight on the roof.

  1. Mark the center of the desired area.
  2. Draw the dimensions of the skylight frame based on the manufacturer’s guidelines.
  3. Leave extra room for flashing and insulation.

Double-check your measurements before moving to the next step. Precision here ensures the rest of the process goes smoothly.


Step 3: Prepare the Roof and Cut the Opening

Cutting into your roof might seem intimidating, but following these steps ensures a safe and accurate process:

  1. Remove shingles or roof tiles in the marked area using a utility knife.
  2. Use a circular or reciprocating saw to cut out the skylight opening. Work carefully to avoid damaging surrounding roof areas.
  3. Clear any debris from the cut section.

If you’re feeling unsure about this stage, it’s okay to step back. Call Tony The Handyman—we’ll handle the toughest parts of the installation with care and precision.


Step 4: Install the Skylight Frame

The skylight frame is the foundation of the entire structure. Here’s how to install it correctly:

  1. Place the frame into the opening you’ve created.
  2. Secure it firmly using screws, ensuring no gaps between the frame and roof.
  3. Check the alignment with a spirit level to confirm it’s properly positioned.

This step is critical for ensuring your skylight is stable and weatherproof. Knowing how to set up skylight frame accurately will prevent future issues like leaks or sagging.


Step 5: Attach Waterproof Flashing

Waterproof flashing protects your home from leaks by sealing the skylight against rain and moisture.

  1. Install flashing around the frame, starting at the bottom and working your way up.
  2. Overlap pieces to ensure complete coverage.
  3. Use roofing nails to secure the flashing, then apply a generous layer of silicone caulk to seal edges.

Integrating the flashing with your existing roof material ensures a clean and watertight finish.


Step 6: Insulate Around the Frame

Proper insulation is vital to prevent energy loss and improve comfort.

  1. Insert foam or fiberglass insulation around the skylight frame.
  2. Avoid compressing the insulation, as this can reduce its effectiveness.
  3. Ensure there are no gaps where air can escape.

By insulating well, you’ll maximize the energy efficiency of your new skylight.


Step 7: Install the Skylight Glazing

Now it’s time to secure the glass or acrylic dome:

  1. Carefully lift the skylight glazing into place.
  2. Follow the manufacturer’s instructions for attaching the glazing to the frame.
  3. Use a weatherproof seal to secure the edges, ensuring no water can seep through.

With the glazing installed, your skylight is nearly complete!


Step 8: Test for Leaks and Final Adjustments

Before declaring the project finished, test the installation for any potential issues:

  1. Spray water over the skylight to check for leaks.
  2. Inspect flashing, seals, and insulation to ensure everything is tight and secure.
  3. Make adjustments as needed to address any weaknesses.

This testing phase is essential for long-term durability and peace of mind.


Common Pitfalls to Avoid

Even experienced DIYers can run into challenges when learning how to set up skylight frame. Here’s a quick guide to common mistakes and how to avoid them:

Problem Solution
Misaligned Frame Double-check alignment with a spirit level.
Insufficient Waterproofing Use extra flashing and high-quality caulk.
Poor Insulation Ensure insulation is evenly distributed.
Structural Weakness Add reinforcing supports if necessary.

When to Call a Professional

Installing a skylight involves working at heights and dealing with structural components of your roof. If you’re unsure about any aspect of the process, don’t take unnecessary risks.

Tony The Handyman offers professional installation services, ensuring your skylight is safe, functional, and visually appealing. Call us at (437) 818-5979, and we’ll take care of everything—from start to finish—with a potential discount!


Skylight Maintenance Tips

Once your skylight is installed, proper maintenance ensures it lasts for years:

  • Clean Regularly: Use mild soap and water to clean the glass or dome.
  • Inspect Flashing: Check for wear or damage, especially after storms.
  • Reseal When Needed: Reapply caulk or weatherproofing materials if leaks develop.

Regular upkeep enhances the lifespan and efficiency of your skylight.


Frequently Asked Questions (FAQs)

1. How long does it take to install a skylight frame?

It typically takes a day for professionals. DIY projects may take longer depending on experience and preparation.

2. Can I install a skylight on any type of roof?

Yes, but the process varies for different roof styles. Flat roofs may require special consideration compared to pitched roofs.

3. What’s the cost of hiring a professional?

Costs vary based on skylight size and roof type. Contact us at (437) 818-5979 for a customized quote!

4. Do skylights add value to my home?

Absolutely! Skylights improve natural lighting and aesthetics, which can boost your home’s market value.

5. How do I ensure my skylight doesn’t leak?

Proper installation of flashing, insulation, and seals is key to preventing leaks.

6. Can Tony The Handyman help with repairs?

Yes! We specialize in both installation and repairs. Call us today for reliable service.


Conclusion

Installing a skylight is a rewarding project that brightens your home and boosts its appeal. By following this guide on how to set up skylight frame, you can achieve a successful DIY installation. However, if you’re feeling unsure or want to ensure a flawless finish, Tony The Handyman is here to help.

Call us at (437) 818-5979, and let our experienced team take care of the hard work. Don’t forget to ask about our discounts—you’ll get professional service at a great value!

How to Reset Skylight Frame

How to Reset Skylight Frame: A Step-by-Step Guide

How to Reset Skylight Frame: A Step-by-Step Guide 991 549 admin


Are you wondering how to set up Skylight Frame efficiently and safely? Skylight roof windows are a perfect addition to brighten your home and provide ventilation. However, like any advanced system, they may require resetting or reconfiguration to maintain functionality. Whether you’re experienced with DIY repairs or prefer expert help, this guide will show you exactly how to set up Skylight Frame and reset it when necessary.

If you’re not confident about handling this task on your own, don’t worry. Call Tony The Handyman at (437) 818-5979, and we’ll take care of it for you. You’ll also enjoy a discount with our professional services!


What Is a Skylight Frame?

A Skylight Frame refers to the structural and operational components of a roof window, allowing for features like remote-controlled opening, ventilation, and light adjustments. These frames integrate with smart technologies, making them energy-efficient and easy to operate.

Occasionally, your Skylight Frame may need resetting due to:

  • Software glitches that disrupt remote operations.
  • Power outages causing the system to malfunction.
  • Routine maintenance to restore default settings.

Knowing how to set up Skylight Frame ensures your roof window continues to provide the comfort and aesthetics you expect.


Why Resetting Is Important

Resetting is not just about fixing a malfunction; it also:

  1. Restores Default Settings: Erases old configurations and ensures the frame operates as intended.
  2. Clears System Errors: Fixes minor bugs or glitches affecting performance.
  3. Prepares the System for Updates: Essential when upgrading to new firmware or connecting additional smart devices.

Ignoring these resets can lead to poor functionality, including limited opening/closing or inconsistent lighting adjustments.


Step-by-Step Guide: How to Set Up Skylight Frame

Step 1: Prepare Your Workspace

Before diving into how to set up Skylight Frame, ensure your workspace is safe and free from hazards. Place a sturdy step ladder securely under the skylight, and gather these tools:

  • Screwdrivers (Phillips and flathead)
  • A small reset pin or similar tool
  • User manual (always helpful for specific models)

Safety is a priority—make sure you’re wearing stable footwear and there’s no risk of slipping.


Step 2: Locate the Reset Button

Every Skylight Frame has a reset button, but the location varies by model. It is often found:

  • Inside the motor housing near the hinge.
  • Under a small cover on the frame’s side.
  • On the control panel if your skylight is motorized.

If you’re struggling to find it, refer to your user manual or contact a professional like Tony The Handyman.


Step 3: Perform the Reset

Now that you’ve located the reset button, follow these steps:

  1. Turn Off the Power: For motorized skylights, switch off the power supply to ensure safety.
  2. Press and Hold the Reset Button: Use a small pin to press the button firmly for 5–10 seconds until you hear a beep or notice an indicator light flashing.
  3. Turn Power Back On: Reconnect the power, and the system should now be reset to default.

Step 4: Reconfigure Settings

Once the reset is complete, it’s time to reconfigure your skylight settings:

  • Use the remote control or app to test opening and closing functions.
  • Adjust ventilation or lighting preferences as needed.
  • If your skylight is part of a smart home system, reconnect it via the app.

Remember, patience is key. If the system doesn’t respond as expected, repeat the reset process.


Common Problems and Troubleshooting Tips

Resetting a Skylight Frame isn’t always straightforward. You might encounter these issues:

  1. Reset Button Not Working: Ensure the button is being pressed firmly and for the required time. If it’s unresponsive, inspect for physical damage.
  2. No Indicator Light or Beep: This could signal a power supply issue. Double-check that the skylight is properly connected to electricity.
  3. Settings Won’t Save: Ensure there’s no interference during the reset, such as a power outage or accidental button release.

If troubleshooting doesn’t solve the issue, it’s time to call in the professionals. Reach out to Tony The Handyman at (437) 818-5979. We’ll resolve the problem swiftly and offer a discount for your convenience!


Optimizing Skylight Performance Post-Reset

After resetting, consider these tips to keep your Skylight Frame functioning perfectly:

  • Update Firmware: For smart skylights, keeping the system updated improves compatibility and performance.
  • Inspect Moving Parts: Check for wear and tear on hinges and tracks that could affect smooth operation.
  • Seal Maintenance: Regularly inspect seals for cracks or gaps that might cause water leaks.

Why Hire Professionals Like Tony The Handyman?

While learning how to set up Skylight Frame can save money, mistakes during setup can cost more in repairs. Professionals like Tony The Handyman provide:

  1. Expert Knowledge: We know the ins and outs of every Skylight Frame model.
  2. Time Savings: What might take you hours, we can accomplish quickly and efficiently.
  3. Safety Assurance: No need to climb ladders or risk injury—we’ve got the tools and experience for the job.

Call us today at (437) 818-5979, and we’ll reset your Skylight Frame while offering you a special discount!


The Cost of Delaying Repairs

Ignoring a malfunctioning Skylight Frame could result in:

  1. Increased Energy Bills: A faulty frame may let in drafts, reducing insulation efficiency.
  2. Water Damage: Gaps or leaks can lead to mold growth and ceiling damage.
  3. Reduced Lifespan: Neglecting repairs accelerates wear and tear, leading to costly replacements.

Save yourself time, money, and stress—contact Tony The Handyman for all your skylight needs.


DIY vs. Professional Setup

While this guide offers detailed instructions for how to set up Skylight Frame, here’s why hiring a professional is often the smarter choice:

  • Expertise: We’re equipped to handle complex setups and troubleshoot unexpected issues.
  • Efficiency: Save time and avoid frustration by letting us do the work.
  • Peace of Mind: Rest assured knowing your skylight is properly installed and maintained.

Skylight Maintenance Tips

Maintaining your Skylight Frame ensures its functionality for years to come. Here’s how:

  1. Regular Cleaning: Wipe down glass surfaces with a microfiber cloth and use compressed air for tracks.
  2. Lubrication: Apply a light lubricant to moving parts to keep them operating smoothly.
  3. Seasonal Inspections: Check for damage after storms or extreme weather conditions.

Routine care prevents small problems from escalating into major repairs.


Get Help From Tony The Handyman Today!

If you’re still unsure about how to set up Skylight Frame, there’s no need to stress. With years of experience and countless satisfied customers, Tony The Handyman is your go-to solution.

We offer professional setup, maintenance, and repairs for all types of skylight frames. Plus, we pride ourselves on delivering exceptional service at affordable rates. Call us today at (437) 818-5979—we’ll take care of everything and even give you a discount!


Frequently Asked Questions

1. What should I do if the reset button is hard to reach?

Use a long, slim tool like a pen or pin to press the button. If you’re still unable to access it, contact a professional.

2. Can I reset my Skylight Frame during a storm?

It’s safer to wait until weather conditions improve before attempting any resets or maintenance.

3. How often should I clean my skylight frame?

Clean it at least twice a year, or more frequently in areas with heavy dust or pollen.

4. Why isn’t my Skylight Frame responding after a reset?

Ensure all power connections are secure, and repeat the reset process if necessary. Persistent issues may require professional assistance.

5. What tools do I need for skylight frame maintenance?

Basic tools like screwdrivers, a step ladder, and cleaning supplies are usually sufficient.

6. Can Tony The Handyman repair damaged skylights?

Absolutely! We specialize in skylight repairs, resets, and maintenance, ensuring optimal functionality for your home.


Conclusion
Resetting your Skylight Frame is a manageable task with the right tools and instructions. However, if you’re feeling overwhelmed or unsure, calling a professional is the best option. At Tony The Handyman, we provide quick, reliable service to get your skylight back in shape.

Call us today at (437) 818-5979 to schedule a visit. Don’t forget to ask about our discount for first-time customers!

How to Install Skylight

How to Install Skylight: A Comprehensive Guide by Tony The Handyman

How to Install Skylight: A Comprehensive Guide by Tony The Handyman 867 550 admin

Adding a skylight to your home can transform a dim, confined space into a bright, airy haven. Skylights flood your living space with natural light, improve ventilation, and even reduce energy bills by minimizing the need for artificial lighting. However, many homeowners feel apprehensive about installing a skylight due to the complexity of the task. This step-by-step guide simplifies the process, ensuring you learn how to install skylight efficiently and safely.

If at any point you feel uncertain or overwhelmed, call Tony The Handyman at (437) 818-5979, and we’ll handle the installation for you – even at a discounted price! We’ve got the tools, expertise, and experience to make your skylight dreams a reality.


Benefits of Installing a Skylight

A skylight installation brings both aesthetic and practical benefits:

1. Enhanced Natural Lighting

Installing a skylight introduces natural sunlight into your home, creating a vibrant, inviting atmosphere. This is particularly beneficial for rooms like kitchens, bathrooms, and attics that lack adequate lighting.

2. Energy Efficiency

By reducing your reliance on artificial lighting and heating, a skylight can lower energy costs. Modern skylights are designed with energy-efficient glazing to maintain indoor temperatures.

3. Boosted Property Value

Skylights add a contemporary touch to homes, increasing their market appeal. Homes with ample natural light often command higher selling prices.

4. Improved Ventilation

Vented skylights can promote airflow, keeping spaces cool and fresh. This is especially advantageous for humid areas such as bathrooms.

While the benefits are plentiful, improper installation can negate these advantages. That’s why it’s crucial to follow the steps carefully or hire professionals if needed.


Essential Tools and Materials

Before you start the installation process, gather the following tools and materials:

  • Measuring tape
  • Circular saw or reciprocating saw
  • Hammer and nails
  • Utility knife
  • Roofing shingles
  • Skylight kit (ensure compatibility with your roof pitch)
  • Flashing kit
  • Sealant (roofing-specific)
  • Screwdriver and screws
  • Safety equipment (gloves, goggles, and a harness)

Having the right tools ensures accuracy and minimizes risks during the installation.


Step 1: Plan Your Skylight Installation

Proper planning is essential for a successful skylight installation. Here’s how to get started:

1. Select the Location

  • Choose a spot that receives direct sunlight and isn’t obstructed by chimneys or vents.
  • For optimal results, the location should align with your ceiling structure and existing rafters.

2. Determine Roof Suitability

  • Inspect your roof’s pitch, as it influences the skylight model you’ll need.
  • Flat and low-slope roofs require specially designed skylights with proper drainage systems.

3. Choose the Right Skylight

Decide between fixed, vented, or tubular skylights based on your needs:

  • Fixed Skylights: Ideal for increasing natural light without ventilation.
  • Vented Skylights: Perfect for spaces needing better airflow.
  • Tubular Skylights: Best for small areas like closets or hallways.

Step 2: Mark the Placement

Marking the skylight placement accurately is a crucial step in learning how to install skylight:

  1. Use the skylight’s dimensions to outline its position on your ceiling and roof.
  2. Ensure the layout avoids interfering with rafters, electrical wiring, or plumbing.
  3. Drill small pilot holes in the corners of the outlined area to guide your cuts later.

Step 3: Cut the Roof Opening

Cutting the roof requires precision to avoid damaging your home’s structure:

  1. From the roof, locate the pilot holes you drilled earlier.
  2. Use a circular or reciprocating saw to cut the marked section carefully.
  3. Remove the cut-out piece and inspect the opening for smoothness.
  4. Clear any debris or insulation for a clean installation area.

This step can feel daunting for DIYers. If you’re unsure or worried about making a mistake, call Tony The Handyman at (437) 818-5979. We’ll handle the hard work – with a discount!


Step 4: Install the Skylight Frame

The skylight frame forms the foundation for the installation. Follow these steps:

  1. Insert the frame into the opening, ensuring it fits snugly.
  2. Secure the frame with nails or screws, adhering to the manufacturer’s guidelines.
  3. Apply a waterproof membrane around the frame’s edges to protect against leaks.

Step 5: Add Flashing to Prevent Leaks

Flashing is critical for sealing the skylight against water infiltration. Here’s how to do it:

  1. Install step flashing along the skylight’s sides, overlapping each piece with the roofing shingles.
  2. Apply continuous flashing along the top and bottom edges.
  3. Secure the flashing with nails and seal all gaps using roofing-grade caulking.

Proper flashing ensures your skylight remains watertight, preventing costly repairs down the line.


Step 6: Secure the Skylight

With the frame and flashing in place, it’s time to install the skylight itself:

  1. Carefully position the skylight over the frame.
  2. Fasten it securely using the hardware provided in the skylight kit.
  3. Double-check that the skylight is level and tightly sealed.

Step 7: Re-shingle and Seal the Roof

Reintegrating the shingles with the skylight is essential for a seamless finish:

  1. Replace roofing shingles around the skylight, ensuring they overlap the flashing edges.
  2. Apply roof sealant to all exposed nails, edges, and vulnerable areas.
  3. Inspect the roof for any signs of gaps or improper alignment.

Step 8: Finish the Interior

Finally, focus on the skylight’s interior appearance:

  1. Install drywall or wood trim around the skylight’s edges to conceal the opening.
  2. Caulk and paint the trim for a polished look that blends with your decor.

Common Challenges and How to Avoid Them

While the process may seem straightforward, there are common challenges associated with learning how to install skylight:

1. Leaks

Improper sealing or flashing can lead to leaks. Always use waterproof materials and follow manufacturer instructions.

2. Structural Weakness

Cutting through rafters without reinforcement compromises your roof’s integrity. Consult a professional if structural adjustments are needed.

3. Condensation Issues

Poor insulation around the skylight can result in condensation. Use high-quality insulation to avoid this problem.


Why Choose Tony The Handyman?

Installing a skylight is an investment, and mistakes can be costly. That’s where Tony The Handyman comes in:

  • Experienced Team: With years of experience, we know exactly how to install skylight safely and efficiently.
  • Affordable Services: We offer competitive pricing and discounts to make your dream home upgrade a reality.
  • Customer Satisfaction Guaranteed: Our team is dedicated to delivering flawless installations that exceed expectations.

Don’t let the fear of mistakes hold you back. Call us today at (437) 818-5979, and we’ll handle everything from start to finish – with a discount, just for you!


FAQs About Skylight Installation

1. How long does skylight installation take?

Typically, it takes 1–3 days, depending on the roof type, skylight size, and complexity.

2. Can I install a skylight on any roof?

Skylights can be installed on most roofs, but flat and steep roofs require specific models and techniques.

3. What is the cost of skylight installation?

DIY installation costs around $500–$1,000, while professional services range from $1,000 to $2,500.

4. How do I prevent leaks after installing a skylight?

Proper flashing and sealing are crucial to preventing leaks. Follow all instructions carefully or hire professionals for peace of mind.

5. Do skylights require maintenance?

Yes, regular cleaning and occasional sealing checks are necessary to maintain performance and longevity.

6. Can I replace an old skylight with a new one?

Yes, replacement involves removing the old skylight and installing a new one in its place, often requiring updated flashing and sealing.


Final Thoughts

Adding a skylight to your home is a transformative upgrade that enhances aesthetics, comfort, and value. While this guide offers a comprehensive walkthrough, it’s essential to prioritize safety and accuracy. If you’re unsure about how to install skylight, let Tony The Handyman handle it with professionalism and care.

Call us today at (437) 818-5979 for expert help and exclusive discounts. Let us bring natural light into your home – hassle-free!

How to Cover Skylight from Inside

How to Cover Skylight from Inside: Effective Solutions by Tony The Handyman

How to Cover Skylight from Inside: Effective Solutions by Tony The Handyman 889 544 admin

Skylights can transform a room, flooding it with natural light and creating an open, airy atmosphere. However, they can also cause some challenges, such as excessive heat, glare, or lack of privacy. If you’re searching for how to cover skylight from inside, you’ve landed on the perfect guide. This article not only shares practical solutions but also highlights why hiring Tony The Handyman is the best way to ensure a stress-free experience.

If DIY isn’t your style, call us at (437) 818-5979. We’ll take care of everything, and we’re happy to offer discounts for first-time clients!


Why Covering a Skylight from the Inside Matters

Although skylights are a great architectural feature, there are valid reasons to consider covering them:

  1. Temperature Regulation: Skylights can let in too much heat during summer and allow warmth to escape in winter, leading to higher energy bills.
  2. Glare Reduction: Direct sunlight can create an uncomfortable environment, making it difficult to relax, watch TV, or work.
  3. UV Protection: Extended exposure to sunlight can fade furniture, flooring, and artwork.
  4. Privacy Concerns: Depending on placement, skylights can expose your interiors to neighbors or nearby buildings.

Understanding how to cover skylight from inside helps you mitigate these issues while retaining the aesthetic appeal of your space.


Best Methods to Cover Skylights

Let’s dive into the top ways to cover skylights and improve your home’s comfort and energy efficiency.

1. Cellular Shades

Cellular shades are one of the most energy-efficient options for covering skylights. These honeycomb-style shades trap air within their cells, providing insulation.

  • Features and Benefits:
    • Energy Efficiency: Minimize heat gain in summer and heat loss in winter.
    • Light Control: Available in light-filtering or blackout options.
    • Customizable Aesthetics: Choose from a variety of colors and patterns to match your decor.
  • Installation Tips:
    Cellular shades come with special mounting kits for skylight frames. However, installation can be tricky for high or angled skylights. Call Tony The Handyman at (437) 818-5979 for professional installation.

2. Roller Shades

Roller shades provide a sleek, minimalist solution for skylights. Whether you want total darkness or soft, diffused light, roller shades have you covered.

  • Why Choose Roller Shades?
    • Available in blackout, translucent, and light-filtering fabrics.
    • Optional motorized controls for convenience, especially for hard-to-reach skylights.
  • Pro Tip:
    Motorized shades are perfect for high ceilings. Not sure where to start? Tony The Handyman can guide you through the process.

3. Skylight Covers

Skylight covers, made from UV-resistant materials, can be placed inside the frame to block heat and sunlight effectively.

  • Benefits:
    • Easy to remove or replace.
    • Prevents UV damage to your interiors.

For a flawless fit and installation, don’t hesitate to contact us. We specialize in customized solutions for even the trickiest skylight designs.


Creative Skylight Covering Ideas

Looking for more unique ways to address how to cover skylight from inside? Here are some creative options:

4. Frosted Window Film

Frosted film is an inexpensive and stylish way to diffuse light while maintaining privacy.

  • Key Benefits:
    • Blocks glare without completely darkening the room.
    • Affordable and easy to install.
  • DIY Installation:
    Clean the skylight glass, measure the film, and apply it carefully using a squeegee to eliminate air bubbles.

5. Curtains or Drapes

If you’re a fan of a cozier, traditional aesthetic, curtains or drapes can work wonders for skylight coverage.

  • How to Use:
    • Install a curtain rod on the ceiling or around the skylight frame.
    • Opt for blackout curtains for maximum privacy and light control.

6. Insulated Panels

Insulated panels provide a highly effective, energy-efficient solution for covering skylights from the inside.

  • Advantages:
    • Total blackout for better temperature control.
    • Perfect for bedrooms, home theaters, or offices.

These panels can be custom-made to fit your skylight precisely. Need help measuring and installing? Call us today!


Should You DIY or Hire a Professional?

When covering a skylight, the question often arises: should you tackle the project yourself or call an expert?

DIY Approach

If you enjoy hands-on projects, covering a skylight can be a manageable task.

  • Steps to Follow:
    1. Measure the dimensions of your skylight accurately.
    2. Purchase high-quality materials such as frosted film, shades, or panels.
    3. Follow the installation instructions carefully.
  • Challenges:
    • High skylights can be difficult to access safely.
    • DIY errors may lead to poor fitting or reduced effectiveness.

Why Hire Tony The Handyman?

When it comes to tasks like skylight coverage, hiring professionals like Tony The Handyman ensures quality results and peace of mind.

  • Reasons to Choose Us:
    • We’re experienced in skylight solutions and challenging installations.
    • Our services are quick, affordable, and hassle-free.
    • New clients enjoy exclusive discounts!

If you’re uncertain about how to cover skylight from inside, give us a call at (437) 818-5979. We’ll take care of everything, so you don’t have to.


Additional Tips for Skylight Coverage

7. Energy-Saving Benefits

Covering your skylight effectively can:

  • Reduce cooling costs in the summer.
  • Lower heating bills in the winter.
  • Improve overall energy efficiency in your home.

8. Aesthetic Upgrades

With a wide variety of materials available, you can choose coverings that enhance your room’s style while solving practical issues.

9. Enhanced Comfort

No more squinting in the glare of the sun or struggling to maintain a consistent room temperature. Skylight coverings offer greater comfort year-round.


Common Mistakes to Avoid

1. Ignoring Proper Measurements

Incorrect measurements lead to ill-fitting coverings, which compromise functionality and appearance. Always double-check dimensions.

2. Choosing Inappropriate Materials

Not all materials work for every skylight. For example, lightweight shades may sag on large skylights. Consult experts to find the right solution.

3. Skipping Maintenance

Dust and dirt can accumulate on your coverings over time. Regular cleaning preserves their look and effectiveness.


FAQs About Skylight Covering Solutions

Q1: How much does it cost to cover a skylight from inside?
The cost depends on the materials and complexity of installation. For a detailed estimate, contact Tony The Handyman today!

Q2: Can I cover a skylight temporarily?
Yes, options like magnetic blackout covers or frosted films are removable and temporary.

Q3: Are all skylight coverings energy-efficient?
Not all materials offer insulation benefits. Cellular shades or insulated panels are your best bets for energy savings.

Q4: Is it difficult to install coverings on a sloped skylight?
It can be tricky! Motorized solutions or professional installation can simplify the process.

Q5: How do I clean my skylight coverings?
Most coverings, like shades and films, require occasional dusting or a gentle wipe with a damp cloth.

Q6: Can Tony The Handyman help with unusual skylight shapes?
Absolutely! We specialize in customized solutions for skylights of all sizes and shapes. Call us at (437) 818-5979 for expert assistance.


Why Trust Tony The Handyman?

When it comes to figuring out how to cover skylight from inside, Tony The Handyman is the go-to solution for homeowners who want quality work and peace of mind.

  • Our Expertise:
    With years of experience, we’ve tackled skylights in all shapes, sizes, and locations.
  • Our Commitment:
    Your satisfaction is our priority. We take the time to understand your needs and deliver tailored solutions.
  • Our Offers:
    Don’t forget—we provide discounts for new clients. Contact us today for affordable, professional service!

Final Thoughts on Skylight Coverage

Covering a skylight from the inside doesn’t have to be complicated or stressful. With so many options—from cellular shades to frosted films—you can find a solution that matches your style and budget. For those who prefer professional help, Tony The Handyman is just a phone call away at (437) 818-5979.

Don’t hesitate—call us now to get expert service, exclusive discounts, and the comfort you deserve.

What Is a Skylight

What Is a Skylight and How It Can Transform Your Home?

What Is a Skylight and How It Can Transform Your Home? 1004 548 admin

Adding a skylight to your home is more than just a design upgrade—it’s a lifestyle improvement. But first, what is a skylight? A skylight is an architectural feature, essentially a window installed in the roof or ceiling, designed to bring in natural light. It not only enhances the aesthetics of a space but also has practical benefits such as improving energy efficiency, ventilation, and overall comfort.

Skylights are versatile and available in a variety of shapes, sizes, and designs, making them suitable for virtually any type of building, from homes to offices and commercial spaces. They are perfect for creating brighter, airier rooms while reducing dependency on artificial lighting.

If you’ve been considering ways to transform your living space into something more vibrant and inviting, understanding the benefits of skylights and how they are installed can be the first step toward achieving your goal.


The Growing Popularity of Skylights

1. Enhanced Natural Light

A well-placed skylight can flood your home with sunlight, significantly brightening your living space. Sunlight not only improves the appearance of a room but also positively impacts mood, productivity, and overall mental well-being.

2. Energy Efficiency Benefits

Skylights allow you to reduce your reliance on artificial lighting during daylight hours, lowering energy bills. Many modern skylights are designed with advanced insulation properties, ensuring your home remains cool in the summer and warm in the winter.

3. Aesthetic Appeal

Skylights add an undeniable touch of sophistication to any space. They create a sense of openness and modernity, complementing minimalist, contemporary, and even rustic designs.

4. Improved Ventilation

Certain types of skylights can open, allowing fresh air to circulate within your home. This is particularly beneficial in rooms like kitchens and bathrooms, where ventilation is key.

5. Health Benefits

Access to natural light through skylights can boost vitamin D levels, improve sleep cycles, and promote better mental health, making them a valuable addition to any living space.


Types of Skylights to Consider

When determining what is a skylight and what type might work best for your home, it’s essential to explore the various options available:

1. Fixed Skylights

  • Features: Non-operable and designed solely to bring in light.
  • Best For: Large spaces such as living rooms or hallways.
  • Benefits: Low maintenance and cost-effective.

2. Ventilating Skylights

  • Features: Can be opened to provide fresh air.
  • Best For: Bathrooms and kitchens.
  • Benefits: Reduces humidity and improves airflow.

3. Tubular Skylights

  • Features: Compact skylights with reflective tubing that channels light.
  • Best For: Small areas like closets, hallways, or pantries.
  • Benefits: Easy to install and highly energy-efficient.

4. Custom Skylights

  • Features: Made to fit unique spaces or specific design preferences.
  • Best For: Homes with distinctive architectural needs.
  • Benefits: Fully customizable for both function and style.

The Process of Skylight Installation

Installing a skylight can dramatically enhance your home, but it requires proper planning and expertise to get it right.

Step 1: Consultation and Planning

When deciding what is a skylight and where to install it, a professional consultation can make all the difference. Tony The Handyman will assess your home to determine the best placement for optimal light and ventilation.

Step 2: Custom Design Selection

From fixed to ventilating models, you can choose a skylight design that fits your space and needs. Additional features, such as UV coatings, blinds, or energy-efficient glass, can further enhance functionality.

Step 3: Precision Installation

Proper installation ensures that your skylight is watertight, secure, and seamlessly integrated into your roof or ceiling. Our team handles every detail to perfection.

Step 4: Post-Installation Care

After installation, we provide thorough inspections to ensure everything is working correctly. We also offer maintenance advice to keep your skylight in top condition.

If you’re hesitant to take on the task yourself, call us and we will do everything and even with a discount! Tony The Handyman is your trusted partner for professional, affordable skylight installation. Call us now at (437) 818-5979 to get started!


Key Considerations Before Installing a Skylight

1. Placement Matters

Choosing the right spot for your skylight is crucial. You want it to capture maximum sunlight while avoiding overheating or glare. South-facing skylights provide consistent light throughout the day, while north-facing ones bring softer, indirect light.

2. Roof Structure

The type of roof—whether it’s flat, sloped, or tiled—impacts the installation process. Consulting an expert ensures compatibility and a secure fit.

3. Size and Shape

Skylights come in various shapes, including rectangular, circular, or pyramid. Larger skylights offer more light, while smaller ones are ideal for compact spaces.

4. Energy Efficiency

Modern skylights often feature double-glazing, low-E coatings, or tinted glass to reduce heat transfer and prevent UV damage.

5. Building Codes and Permits

In some areas, skylight installation requires adherence to building codes or permits. Tony The Handyman can guide you through this process to ensure compliance.


Common Skylight Problems and How to Avoid Them

Even the best skylights can encounter issues without proper care. Here’s how to prevent common problems:

1. Leaks

Improper sealing or aging materials can lead to leaks, especially after heavy rain. Regular inspections and timely maintenance can prevent this.

2. Condensation

Condensation often occurs in humid spaces like bathrooms. Ventilating skylights or dehumidifiers can address this issue.

3. Overheating

Rooms with south-facing skylights may become overly warm during summer. Install blinds or heat-resistant coatings to mitigate this.

4. Drafts

Ensure the skylight is properly insulated to avoid heat loss during winter.


Why Choose Tony The Handyman for Your Skylight Needs?

1. Unmatched Expertise

With years of experience, we understand what is a skylight and how to install it with precision.

2. Affordable Solutions

Our services are competitively priced, and we offer discounts to make your skylight project cost-effective.

3. Comprehensive Service

From consultation to installation and maintenance, we provide end-to-end solutions.

4. Customer-Focused Approach

We prioritize your satisfaction, ensuring every detail is tailored to your needs.

Call us today at (437) 818-5979 to bring the beauty of natural light into your home.


How Skylights Add Value to Your Home

Adding a skylight not only enhances your home’s aesthetic but also boosts its resale value. Buyers are drawn to spaces with abundant natural light and energy-efficient features. Installing a skylight is a simple yet impactful way to increase your home’s marketability.


FAQs About Skylights

1. What is a skylight, and why should I consider installing one?
A skylight is a roof-installed window designed to bring in natural light. It’s ideal for improving light, ventilation, and energy efficiency.

2. How much does skylight installation cost?
Costs depend on factors like skylight type, size, and installation complexity. Contact Tony The Handyman for a personalized quote.

3. Can skylights help lower my energy bills?
Yes, skylights reduce reliance on artificial lighting and improve insulation when using energy-efficient materials.

4. How long do skylights typically last?
With proper maintenance, high-quality skylights can last 20-30 years or more.

5. Are skylights suitable for all roof types?
Yes, but the installation process may vary based on the roof’s slope or material.

6. What should I do if my skylight leaks?
Call Tony The Handyman for professional inspection and repair. Regular maintenance can also prevent leaks.


Maintenance Tips for Long-Lasting Skylights

To ensure your skylight stays in excellent condition:

  • Clean the glass regularly to remove dirt and debris.
  • Inspect seals and flashing after storms for signs of wear or damage.
  • Use appropriate blinds or shades to control sunlight and prevent overheating.
  • Schedule annual maintenance checks with a professional.

Conclusion

Now that you know what is a skylight, it’s time to take the next step in transforming your home. Skylights aren’t just windows—they’re gateways to natural light, energy savings, and improved well-being. Whether you’re looking to brighten your living room, ventilate your kitchen, or add a luxurious touch to your bathroom, a skylight is an investment worth making.

If you’re afraid to do it yourself, then call us and we will do everything and even with a discount! At Tony The Handyman, we’re dedicated to providing high-quality skylight solutions tailored to your needs. Contact us today at (437) 818-5979 and let us brighten your home with our expert services!

Handyman Etobicoke

Handyman Etobicoke – Expert Home Repairs with Tony The Handyman

Handyman Etobicoke – Expert Home Repairs with Tony The Handyman 1024 1024 admin

Finding a trustworthy and skilled handyman for your home repairs and maintenance in Etobicoke can make a world of difference in maintaining your property. At Tony The Handyman, we understand that your home is your haven, and we’re here to help you keep it that way with our comprehensive handyman services. Whether it’s a small repair or a larger project, we provide the professional help you need. We pride ourselves on being reliable, efficient, and detail-oriented, ensuring your satisfaction with every job. If you’re looking for a Handyman Etobicoke can count on, we’re here to make home repairs and projects easier.

Why Choose Tony The Handyman in Etobicoke?

Choosing the right handyman is crucial for getting quality work that stands the test of time. When you work with Tony The Handyman, you’re not just hiring someone to “fix things”; you’re investing in a team of professionals dedicated to high standards and exceptional customer service. Here’s what makes our services a standout:

  • Skilled and Experienced: Years of experience have honed our ability to take on jobs of all sizes with expertise.
  • Reliable Service: Punctuality, transparency, and communication are at the heart of our business.
  • Wide Range of Services: From electrical to plumbing, painting, and everything in between, we can tackle nearly any job.
  • Personalized Solutions: Every home is unique, and we tailor our services to meet your specific needs.

For an Etobicoke handyman you can trust, give us a call at (437) 818-5979 to get a free estimate.

Our Services: Handyman Etobicoke Can Depend On

Our service offerings are extensive, designed to cover all your home maintenance and repair needs.

1. Home Repairs and Maintenance

Home repairs are our bread and butter. We handle everything from door repairs to window replacements and patching walls. With Tony The Handyman, you don’t need to worry about doing it yourself. Let us manage it for you, efficiently and professionally.

2. Painting Services

Repainting a room or adding a fresh coat to the exterior can transform your home’s appearance. Our painting services offer precision, high-quality paints, and professional-grade tools to ensure a lasting finish. Let us take care of the prep work, painting, and cleanup, making it a stress-free experience.

3. Plumbing Services

From leaky faucets to drain blockages, our plumbing services cover common issues that can disrupt your daily life. Our expertise allows us to quickly identify and resolve plumbing problems so you can get back to normal. When you need a Handyman Etobicoke for plumbing, you can rely on us to get it fixed fast.

4. Electrical Repairs and Installations

Electrical work requires a skilled hand, and we’re equipped to handle both minor repairs and installations. Whether you need help installing lighting fixtures, repairing outlets, or upgrading electrical systems, our team has the know-how to complete the job safely and efficiently.

5. Carpentry Work

Our carpentry services range from small tasks, like shelf installations, to more complex jobs such as cabinet repairs or custom-built furniture. If you’re thinking of making changes that require carpentry skills, give us a call. We’d be happy to provide a free consultation and estimate.

Why Professional Handyman Services Matter

Hiring a professional handyman can save you time, money, and stress. When you choose Tony The Handyman, you’re choosing quality, peace of mind, and the assurance that your projects will be handled with care. We guarantee that our work will meet the highest standards, whether it’s a minor repair or a more complex installation. Our years of experience allow us to provide efficient and effective solutions to any repair needs.

What Sets Us Apart as a Handyman Etobicoke Can Rely On

Many people underestimate the value of a reliable handyman. Here’s how we stand out:

  • Licensed and Insured: We adhere to safety and quality standards, ensuring that every job is completed to code.
  • Transparent Pricing: No hidden fees. We offer a detailed breakdown of costs for complete transparency.
  • Responsive and Flexible: We work around your schedule and ensure timely communication.

Give us a call today at (437) 818-5979 and let’s discuss how we can help. We offer free estimates and are more than happy to answer any questions you may have.

Frequently Asked Questions – Handyman Etobicoke

Q1: What types of handyman services do you offer in Etobicoke?

We cover a wide range of services, including home repairs, painting, plumbing, electrical work, carpentry, and more. From small fixes to bigger projects, Handyman Etobicoke services by Tony The Handyman can cover most home maintenance needs.

Q2: Are you licensed and insured?

Yes, we are fully licensed and insured. We take safety and legal standards seriously, ensuring that our work is completed responsibly.

Q3: How much does a handyman cost?

Costs can vary depending on the complexity of the project. We offer transparent pricing and free estimates so you know what to expect.

Q4: Do you offer free estimates?

Absolutely! Just give us a call, and we’ll be happy to come out and assess your project. We want you to feel comfortable with your decision to hire us.

Q5: What areas do you serve?

Our team is based in Etobicoke, and we proudly serve the surrounding areas as well.

Q6: How soon can you start my project?

We strive to work within your schedule. Call us to discuss your timeline, and we’ll do our best to accommodate.

Contact Tony The Handyman Today!

Ready to get started? Whether you’re looking for a quick fix or a more in-depth renovation, Handyman Etobicoke services by Tony The Handyman have you covered. Our team is here to make home maintenance easy, affordable, and hassle-free.

Reach out to us today to schedule a free consultation and let’s bring your home projects to life with quality and professionalism. Give us a call at (437) 818-5979 and see why so many people choose Tony The Handyman for their Etobicoke handyman needs.

Your Go-To Handyman Burlington Service

Tony The Handyman: Your Go-To Handyman Burlington Service

Tony The Handyman: Your Go-To Handyman Burlington Service 1792 1024 admin

When you need a trustworthy, skilled handyman in Burlington, turn to Tony The Handyman. We understand that keeping your home or business in top condition requires expertise, time, and a keen eye for detail. That’s why Tony The Handyman offers a wide range of services to meet your needs, from small repairs to larger home improvement projects. If you’re looking for a dependable and experienced Handyman Burlington, we’re here to help.

Why Choose Tony The Handyman?

Our team commits to providing exceptional service and quality work. We take pride in every job, whether it’s a small fix or a complete home makeover. Tony The Handyman has earned a reputation throughout Burlington for reliability, fair pricing, and an extensive list of services for both residential and commercial clients. Here are a few reasons why clients trust us with their properties:

  • Experience and Expertise: We bring years of experience to every project, completing tasks efficiently and effectively.
  • Customer Satisfaction: Your satisfaction matters most to us, and we go above and beyond to ensure it.
  • Free Estimates: Call (437) 818-5979 today to get a no-obligation, free estimate. Learn more about how we can help you.

For all your repair and improvement needs in Burlington, choose Tony The Handyman, where quality and customer service come first.

Our Handyman Services in Burlington

Whether you need a small repair or a significant project, Tony The Handyman can take care of it. Here’s a list of our most popular services:

  1. General Repairs: From squeaky doors to drywall repairs, we handle all kinds of general repairs with precision and efficiency.
  2. Painting and Finishing: A fresh coat of paint transforms your space. Our painting services give your home or business a revitalized look that lasts.
  3. Plumbing Repairs: Our team restores your plumbing quickly and efficiently, whether it’s a leaky faucet or an issue with water pressure.
  4. Electrical Repairs: Electrical issues can be complex and dangerous. Trust our skilled handyman team for safe, professional electrical repairs and installations.
  5. Carpentry and Woodwork: Need shelves installed, cabinets refinished, or custom carpentry? We deliver skilled carpentry for all your interior and exterior needs.
  6. Flooring Services: We handle all types of flooring installations and repairs, from tile to laminate and hardwood, making sure every floor looks perfect.

If you’re searching for the best Handyman Burlington service, our team is ready to meet and exceed your expectations.

Why Choose Professional Handyman Services?

Hiring a professional handyman provides peace of mind, knowing the job gets done right the first time. DIY projects can be costly and time-consuming, especially if you lack the right tools or experience. Working with Tony The Handyman gives you access to experienced professionals who understand every detail of your project. Let us handle the work for you!

Need something fixed? Contact Tony The Handyman today for a free estimate, and we’ll ensure your project finishes on time and within budget. Call us at (437) 818-5979 to discuss your needs.

Our Process: How Tony The Handyman Works

  1. Initial Consultation: When you reach out, we’ll discuss your needs in detail to understand the scope of your project.
  2. Estimate and Planning: We provide a transparent, competitive estimate, ensuring there are no hidden fees. We’ll also create a plan and timeline that fits your schedule.
  3. Quality Service Delivery: Our skilled professionals work efficiently and carefully, covering every detail.
  4. Final Walkthrough and Client Approval: Before wrapping up, we perform a final check with you to ensure complete satisfaction.

Testimonials from Our Burlington Clients

Our clients appreciate our services, and we take pride in building long-term relationships with them. Here’s what some of our Burlington clients have to say:

  • John D.: “Tony The Handyman transformed my basement. They were professional, on time, and the quality of work was top-notch. Highly recommend if you’re looking for a reliable Handyman Burlington.”
  • Emily S.: “I called Tony The Handyman for plumbing work and was impressed by their efficiency and fair pricing. They were helpful and explained everything clearly. Will definitely use them again!”

Affordable Handyman Burlington Services

At Tony The Handyman, we believe that quality work doesn’t have to break the bank. We offer affordable handyman services in Burlington with a focus on delivering value and long-lasting results. Our transparent pricing and commitment to quality make us a top choice for homeowners and businesses in the area. Contact us today for a free estimate and see how affordable professional handyman services can be!

Get Started with Your Trusted Handyman Burlington

Finding a reliable handyman who can handle a wide range of services and deliver great results is essential. Tony The Handyman makes that search easy for you. From painting and repairs to installations and custom work, our team does it all. When you need Handyman Burlington, think of us as your one-stop solution.

Don’t let minor issues become major problems. Call us now at (437) 818-5979 to get started.

  • 1
  • 2